
Over the past decades, society has regarded skirts as a staple in women’s fashion. But it wasn’t always that way. Centuries ago, in Ancient Egypt, the first skirts were worn by men. They were called ‘Shendyt,’ a simple garment similar to a wrap-around skirt with a belt at the waist. In prehistoric times, men and women wore skirts because they were the simplest and most practical way to cover the lower body.
Nowadays, however, skirts are mostly worn by women. They now also come in different styles, prints, colors, and lengths. Just browse through online shops like patternemporium.com and you’ll see a variety of skirt designs.
If you have a penchant for DIY-ing stuff, however, creating your very own skirt pattern is possible. To help you get started, here are some tips:
1. Choose The Type Of Skirt You Want To Make
Personalizing clothes is a great way to keep up with chic trends without spending a lot of money on top fashion brands. If you want to design your very own skirt, you have to be acquainted with the different types first. The main ones you should know are the following:
- A-line Skirt: An A-line skirt is an easy one for beginners. This skirt extends from the waist in an A shape. It is tight at the waist, which emphasizes the hips, and then flares out at the bottom. Its unique feature is that it draws attention to the waistline, making it the best choice for curvier women or those with an hourglass, pear, and apple-shaped body.
- Asymmetrical Skirt: This type of skirt is made of fabrics with varying lengths at the hem. It’s sometimes called high-low skirts. Asymmetrical skirts have designs that are chic and elegant, making them perfect for well-toned bodies. People can wear this skirt at pool parties and on casual occasions.
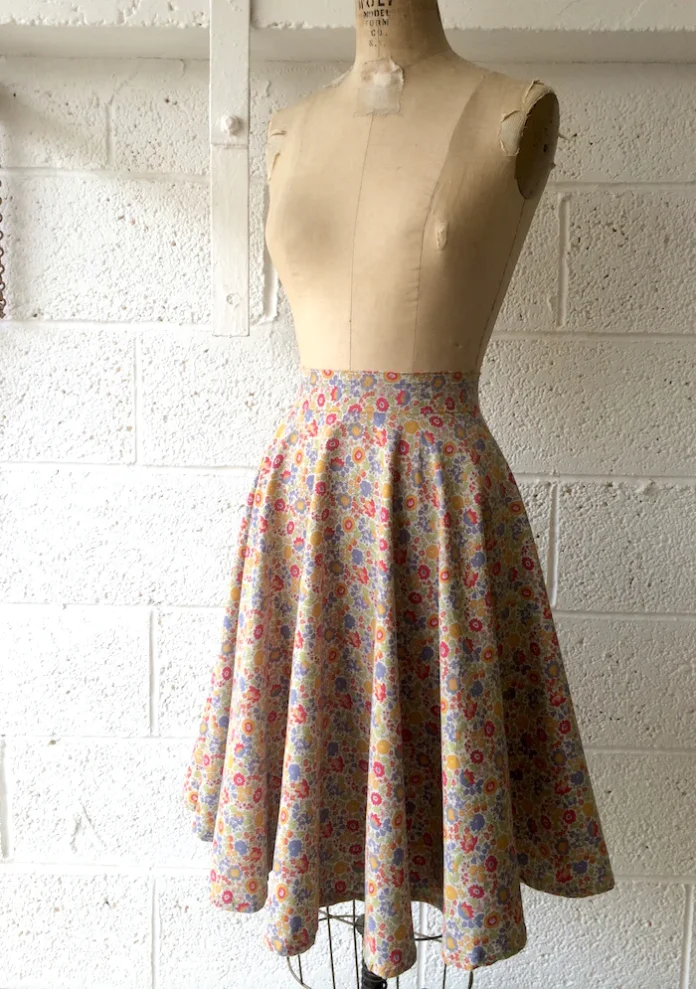
- Bell-Shaped Skirt: This skirt sits at the waist, extends from the waistline, and falls straight to the knees, resembling a bell. It is made of heavy fabrics, so it does not lose shape and holds in place. Bell-shaped skirts add volume below the waistline. They are often knee-length or fall up to the calf.
- High-Waisted Skirt: High-waisted skirts are tied and buttoned at the waist, which is above the hip. Often, this type of skirt has elaborate embellishments at the waistline. A high-waisted skirt is flattering to the abdomen, and it can come in varying lengths. This type of skirt is the best choice for hourglass-shaped bodies and people who have a well-toned waist and hipline.
- Layered Skirt: A layered skirt is composed of layers of fabrics stitched one above the other from the hem of the skirt. This skirt adds a lot of volume to the body, making it the best choice for people who are slim and those who have an hourglass type of body.
2. Know Your Tools
You need the right tools to create the skirt pattern you want. So, take note of the following:
- Pencil – You will use this tool a lot. You need a pencil to make sketches, take notes of measurements, and draft your pattern.
- Pattern Paper – You can use store-bought pattern paper or any ordinary paper that is large enough to draw your patterns in.
- Meter Ruler – You need this as a guide to make straight lines.
- Tape Measure – This tool is important for taking measurements.
- Masking Tape – Masking tapes can help keep your patterns in place. You can also use this to put your patterns together and secure them.
3. Know Which Body Parts You Need To Measure
Knowing how to take measurements correctly is an art and just like any art, you need to master it. The following are the key measurements you have to take if you want to create your own skirt pattern:
- Hip Measurement – Put your tape measure in the widest part of your hips, secure it with your thumb, and bring the tape around the back to reconnect it at the starting point. Do not forget to note down the measurement.
- Waist Measurement – The waist point will determine the overall skirt length you will be drafting. To measure your waist, wrap the tape measure below your ribs, just right above the belly button.
- Waist-To-Hip Measurement – You can take this by measuring the vertical distance between the waistline and down to the hipline.
- Desired Length Of The Skirt – This should be measured from the waistline point, down to your desired hem length.
4. Use The Draping Method

Designers use the draping method to make a 3-dimensional dress pattern. This is done by wrapping a piece of fabric around a mannequin figure. Using this method, you can understand the fabric and properly visualize the design of your skirt. It’s a great way for beginners to easily conceptualize fabric designs. Additionally, draping allows you to make paper patterns that can be used to customize and conceptualize your DIY skirt project.
5. Modern Modiste: Watch Tutorial Videos
Nowadays, you can find tons of free tutorials on the internet—including guides on making your own skirt patterns. It is very accessible and easy to follow. You can pause, play, or fast forward for your convenience. Take advantage of these free lessons and learn as much as you can.
6. Label Your Patterns

To avoid confusion, you should always label your pattern pieces. This is crucial. You can include the date, measurements, sewing instructions, and other details that are important for creating the patterns. Putting a label on your pattern pieces is convenient because you can share your designs with other tailors and even reproduce the exact same skirt pattern without restarting from scratch.
Conclusion
Creating your own skirt patterns is a fun and unique way to unleash your creativity. You don’t have to wait for your favorite shops or brands to release a skirt you like—you can go ahead and create your very own! However, it takes time and skill to master the art of creating skirt patterns. So, if you’re still new to this, take some more time learning about the craft through various tutorials on the Internet. Then, acquaint yourself with the necessary tools and practice your skills.